
I’m not going to make any crazy promises like:
You’ll be paddling a kayak like a pro by the time you finish reading this post.
Reading about how to paddle a kayak won’t magically turn you into a kayaking pro; practice and hard work will.
Here’s what I can promise you, though:
If you stick around, I’ll show you the basics of using a paddle, introduce you to essential paddling strokes, and teach you how to control your kayak more efficiently.
Setting strong foundations for developing your paddling technique; that sounds like a more realistic goal.
Let’s get to work!
Kayak Paddle 101: Know Your Weapon
Kayak paddles do look deceivingly simple, don’t they? Yet, this long shaft with a blade on each end will be one of the most intimate pieces of equipment you’ll own as a kayaker.
Look at it this way:
You are your kayak’s motor – and your paddle is an integral part of the mechanism that transfers each stroke’s energy into motion.
You probably can’t wait to get out kayaking and to the actual paddling, but the lesson on how to paddle a kayak begins long before you ever reach the water. It starts with choosing your trusty double-bladed kayak paddle sidekick! Let’s have a quick rundown of the key parts of kayak paddle
Paddle Shaft
The paddle’s handle, also known as the shaft, is the part you’ll be in direct contact with, with both hands wrapped around it throughout the entire paddling session.
That’s to say, choose one wisely:
- The two most common construction materials used to create a kayak paddle are aluminum and fiberglass, but high-end paddles sometimes feature carbon fiber shafts.
- The three key factors used to determine adequate kayak paddle length should be your height, the type of kayaking you plan on doing, and the hull’s width.
- Use a straight shaft kayak paddle, unless your wrists have a history of repetitive stress injuries; bent shaft kayak paddles minimize the risk of injury by keeping the wrists aligned.
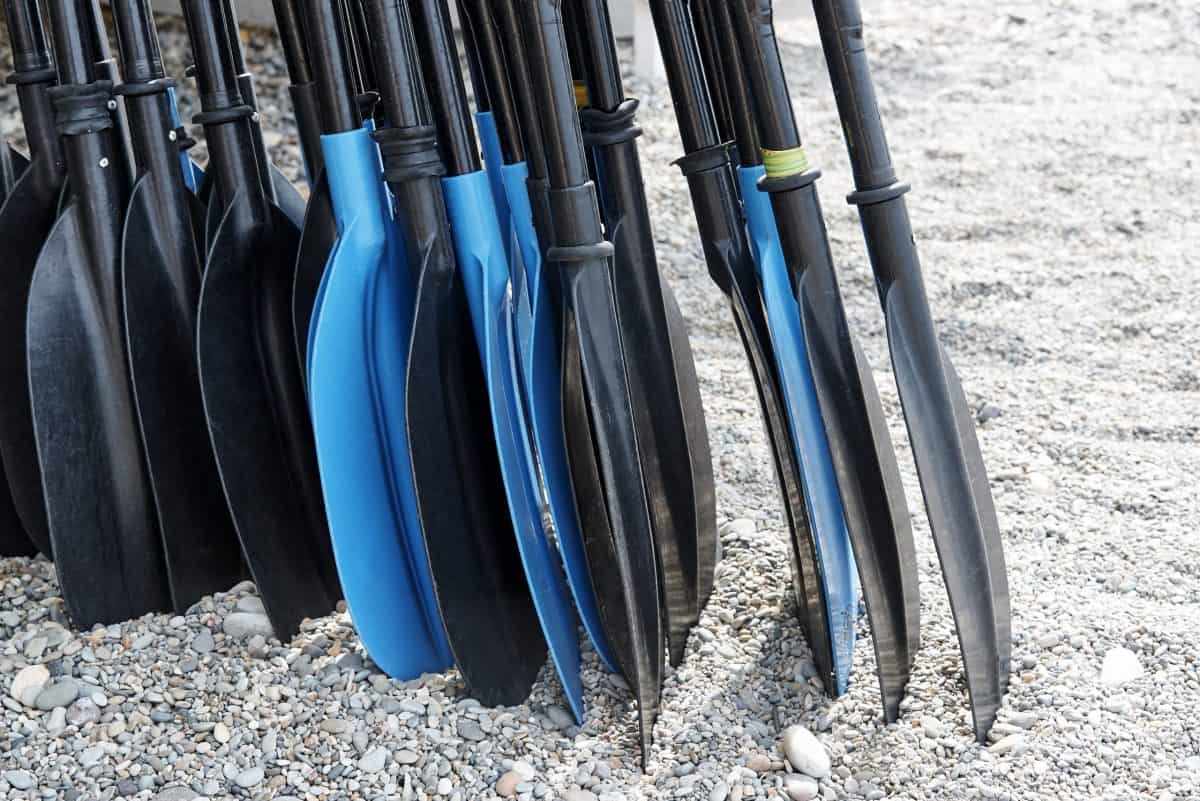
Paddle Blades
Each paddle blade will have two sides – well, duh – called the power face and the back face. The former is the side of the blade that catches the water during the stroke.
And surprise, surprise – not all kayak paddle blades are the same, either:
- Construction materials used for the blades include plastic, fiberglass, aluminum, and – in the case of high-performance paddles – carbon fiber.
- Most kayak paddles feature asymmetrical blades, with one edge shorter than the other. Unlike their oval-shaped counterparts, they help the paddle track straight through the water.
- Feathering or offset – the angle between the blades – reduces the top blade’s wind resistance, but learning how to paddle is generally easier with matched, no-offset blades.
- The high or low angle at which the blade hits the water is also a factor. High-angle paddlers will benefit from wide, short blades; low-angle paddlers require longer, more narrow blades.
More information on high angle vs. low angle paddle can be found here
Benefits Of Good Kayak Paddling Technique: It Matters More Than You Think

There a few essential skills that every kayaker should learn and master; learning to roll a kayak and correct stroke technique.
Everyone has to start somewhere, and the best way to learn is to – well, do it. In that sense, yes, you could hit the waters without any prior knowledge or understanding of kayak paddling techniques.
But that doesn’t mean you should.
Learning how to paddle a kayak has many benefits, including:
- Preventing common paddling-related injuries, such as shoulder dislocation and tendonitis
- Getting more leverage and power with each stroke
- Helping you navigate and control your kayak more efficiently, especially when kayaking as against the current
- Reducing arm fatigue
- Allowing you to travel faster and further by transferring the energy of each stroke more efficiently
- Putting less strain on the body, especially your back, shoulders, and wrists
- Making the kayak track straight – with or without a rudder or skeg – easier
Good Kayaking Paddle Technique Starts With The Paddle

Knowing how to hold a kayak paddle and maintain good posture is the key to an efficient stroke and better kayak paddle technique.
Without good hand placement and a secure grip of the “power hand” – which, in most cases, is the dominant hand – your kayak paddle will be nothing more than a stick.
And it won’t get you far, either.
How To Hold A Kayak Paddle: Hand Placement & Paddler’s Box Explained
The first step in leaning how the paddle, grab your paddle and place your hands on the shaft as if you were about to start paddling. Now, make the following necessary adjustments to ensure that:
- The hands are at about shoulder-width apart – or slightly wider – with the knuckles facing up as you’re holding the paddle.
- The hands are at equal distance from the blade heads – at about 6 inches on each side.
- The elbows are making a 90-degree angle with the kayak paddle lifted on top of your head. Use this to check your “paddler’s box.”
- The blades are oriented properly and perpendicular to the surface. If they’re asymmetrical, the shorter edge should be at the bottom.
- The grip is secure but relaxed. The “power hand” will have a firmer grip, but again, not too tight. The other should maintain a relatively loose, O-shaped grip.
That’s it; you’ve just learned how to hold a kayak paddle!
Take note of the following:
- Place your hands at about shoulder-width apart – or slightly wider – and have your knuckles facing up as you’re holding the paddle.
- Keep the hands at equal distance from the blade heads – at about 6 inches on each side.
- The elbows should make a 90-degree angle with the kayak paddle lifted on top of your head. Use this to check your “paddler’s box.”
- Orient the blades properly and keep them perpendicular to the surface. If they’re asymmetrical, the shorter edge should be at the bottom.
- Your grip should be secure but relaxed. Your “power hand” will typically have a firmer grip, but again, not too tight. The other should maintain a relatively loose, O-shaped grip.

What’s The Paddler’s Box?
It comes down to the positioning of your hands in relation to your shoulders and the paddle:
You should be able to trace the paddler’s box from your hands, up to your arms and shoulders, across the chest, and back to the paddle.
The outlined shape should roughly resemble a square – hence the name paddler’s box.

Here’s the crucial part:
Your paddler’s box should move with you and remain unchanged, staying within the imaginary lines regardless of the direction of the paddle or the rotation of your upper body.
You’ll probably have to check how your paddler’s box is holding up multiple times throughout the day at first. When muscle memory kicks in, your hands will start getting into the right position pretty much automatically.
Watch Your Seating Position & Paddling Posture
The second factor that often gets overlooked by beginners is proper posture and sitting position – which is generally influenced by how you adjust the kayak outfitting:
- Sit up straight – shoulders relaxed and chest open – and avoid slouching. Opt for a seat with adjustable back support but don’t lean against it as if you’re lounging at the beach.
- Rest your feet against the footpegs, with your legs outstretched – but engaged. Maintaining a slight bend allows you to use your legs as leverage more efficiently.
- Your upper thighs – not your knees – should rest against the thigh braces. You’ll remain “connected” to the kayak while also staying comfortable.
Kayak Paddle Techniques 101: Basic Kayak Paddling Techniques For Beginners
Okay, it’s finally time for action.
You’re about to learn the basic kayak paddling techniques you can practice the next time you hit the water!

The Anatomy of a Kayak Paddle Stroke
The anatomy of a paddle stroke can be broken down into three distinct phases:
1. Wind-Up Phase – Wind-up refers to the positioning of your body throughout the stroke. The torso should wind in the initial stroke direction. Keep the lower arm nearly straight; the upper arm should be bent slightly with the wrist at face level.
2. Catch Phase – This phase refers to when the blade enters the water. Unwinding your torso pulls the paddle blade through the water – but not with your arm. The core muscles should do the bulk of the work.
3. Unwind or Recovery Phase – Recovery happens at the end; proper form sets you up for successful execution of the following stroke. One blade lifts out of the water – your elbow guides the movement – while the other moves down, and you wind up for the next stroke.
Each stroke should be consistent and fluid, with the three stages linked into one continuous motion. You might have to modify them depending on the particular stroke – but for the most part, they should still be there.
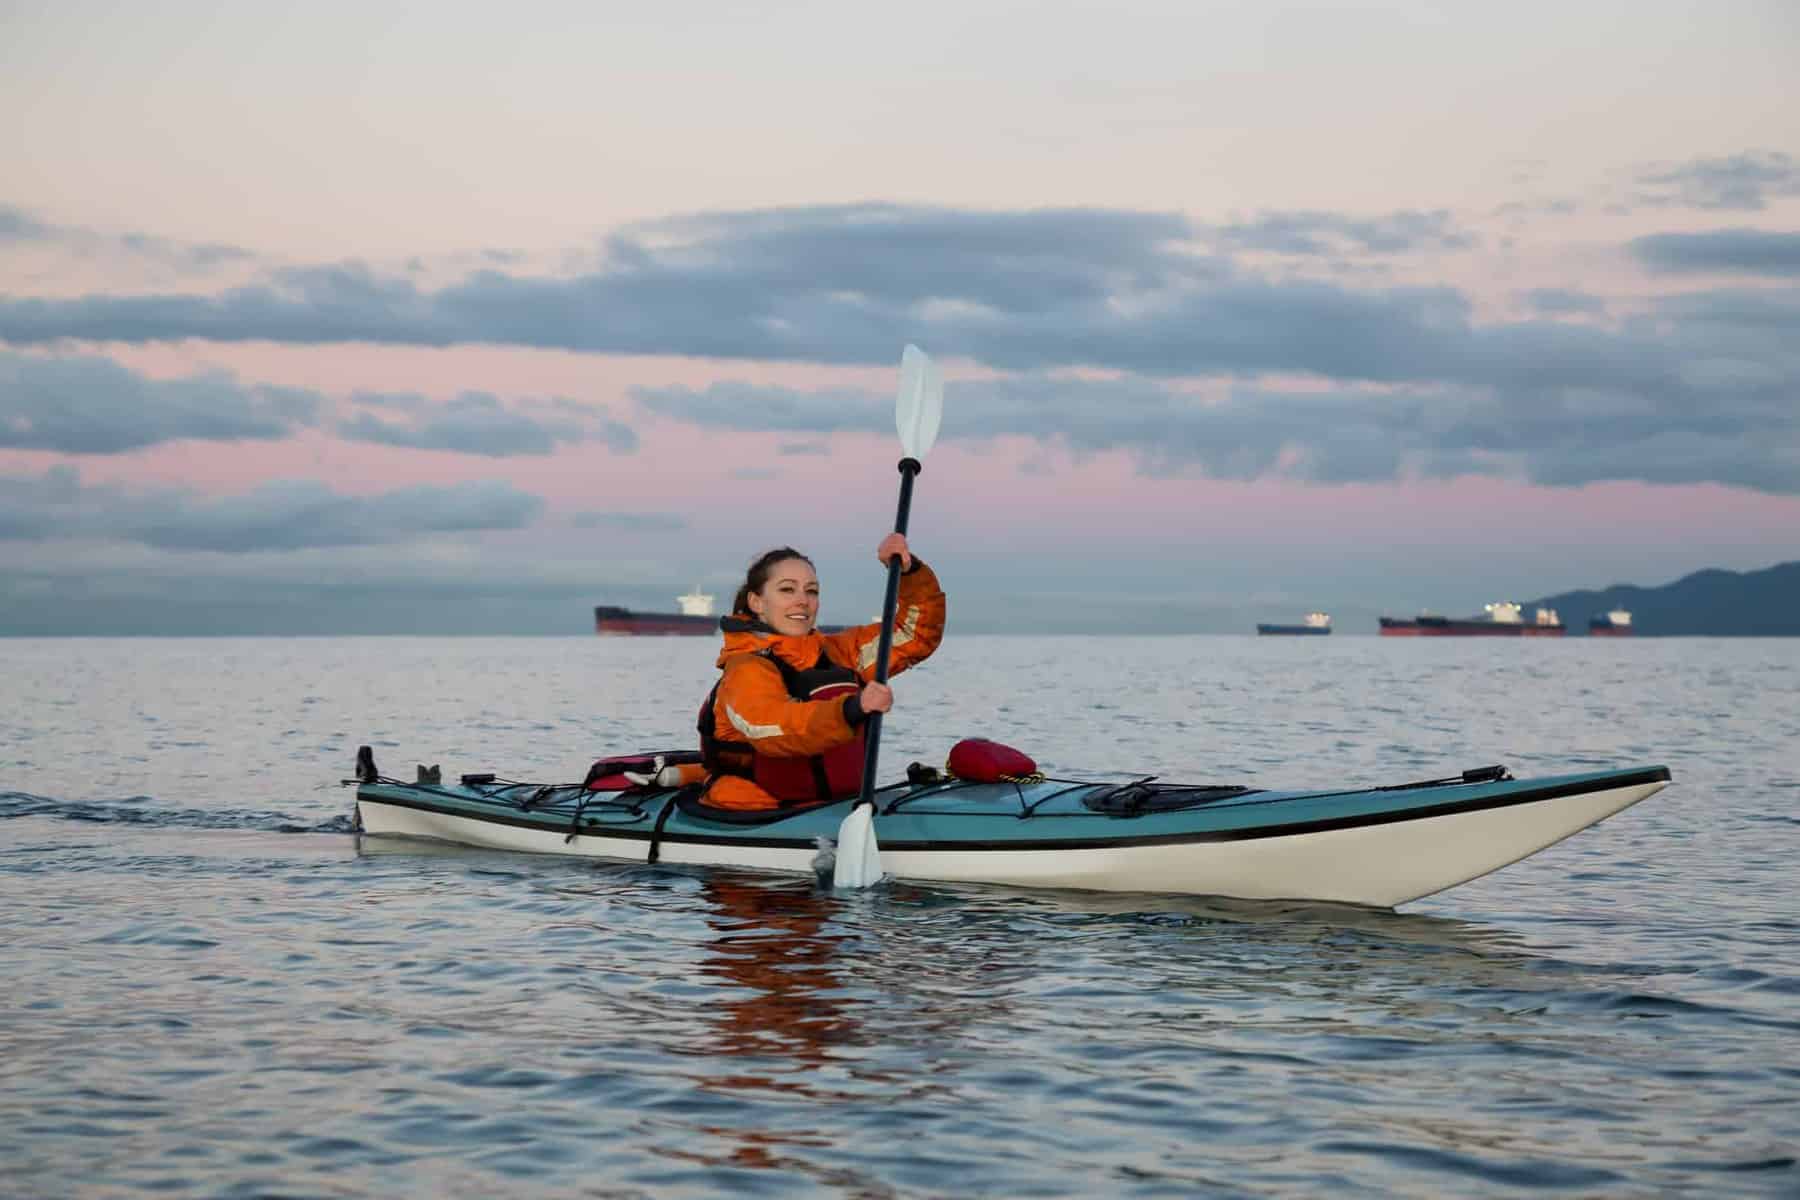
Technique #1: Mastering the Forward Stroke
The forward stroke is the most basic kayaking paddling technique – and one you’ll be using 90% of the time to paddle a kayak. And given that it will be your go-to way of propelling your kayak in a straight line, it should be at the top of your to-do list.
Here’s how to perform a basic forward stroke:
- Sit up and keep your eyes on the horizon.
- Wind your torso and anchor the paddle blade in the water near your feet. It should remain in a near-vertical position and fully submerged throughout the stroke.
- Engage your core and back and start pulling the paddle toward you along the side of the hull to propel the kayak forward. Push against the shaft with your other hand.
- As the blade reaches your hip, slice it out of the water.
- Rotate your body and dip the out-of-water blade into the water to repeat the motion on the other side.
Technique #2: How to Turn and Steer Your Kayak Using a Sweep Stroke
The basic forward stroke will be more than enough to keep you paddling in a straight line – but turning your kayak?
That’s a whole different can of worms.
Sure, relying on the built-in rudder to do the steering is an option. But I believe that every paddler should know how to “survive” on the water without it, using the most basic tool they’ve got – the paddle.
One way to correct your course is to drop the blade in the water on one side or the other; simple as that.

The other is to learn how to do a forward sweep stroke:
- Extend your arm and drop one blade – right one to go left and left one to go right – into the water as far forward as you can comfortably reach. Start the sweep with the blade near your toes.
- Sweep the blade in a big, wide arc – as if you were drawing a large letter “C” – by pulling it toward you. Rotate your torso and keep your arm straight throughout the motion.
- Continue pulling the blade toward the back until it reaches the stern about 10 inches from the hull.
- Slice it out of the water to finish the stroke.
Your ‘yak should make a gradual turn with little to no loss of momentum; repeat the sweep stroke if needed or resume with regular forward strokes.
As for the reverse sweep stroke, it’s pretty much the forward sweep done backward:

The blade enters the water at the back and travels in the opposite direction, towards your toes, stopping once it reaches the front of the kayak.
Technique #3: Reverse Stroke for Paddling Backwards
Now and then, you might have to back up your kayak to get yourself out of a sticky situation. A creek too narrow for your ‘yak to turn or an on-the-water obstacle you want to avoid; you get the idea.
Either way, the reverse stroke is another technique you’ll want to master before you can start exploring new waterways.
It shouldn’t be too hard, though. You’re pretty much doing the basic forward stroke in reverse – stern to bow.
Here’s how to perform a back or reverse stroke:
- Bring the paddle to the back of the kayak and wind your torso in the same direction. Follow the paddle with your eyes if it’s easier; your body will follow.
- Look behind you and, with the blade in the water, pull the paddle toward the bow while keeping it parallel to the hull.
- When it reaches your feet, slice it out and repeat the stroke on the opposite side.

You won’t often find yourself paddling backward – and on the rare occasions that you do, it probably won’t be for long. Still, I recommend practicing paddling in reverse every chance you get.
Slowing Your Kayak Down & Stopping Using the Reverse Stroke
Knowing how to slow the kayak down – and come to a full stop – is as essential as knowing how to paddle forward.
Since your kayak won’t come with a magical “Stop” button or a set of brakes, you’ll have to figure out how to do it using your paddle:
- If you’re going forward, complete three to four short and forceful back paddle reverse strokes on alternate sides.
- If you’re going backward, complete three to four short and forceful forward strokes on alternate sides.
Technique #4: Positioning & Maneuvering Paddle Strokes

Draw Stroke
We talked about paddling forward, backing up, and switching directions – but what about moving your kayak sideways by doing a draw stroke?
You never know; it could be useful when you’re approaching a dock or need to get closer to a friend’s kayak.
Here’s how to do a draw stroke:
- Rotate the paddle’s blade into a horizontal position and turn your body to where you want to go.
- Reach out and drop the blade in the water at about two feet away from your kayak’s side.
- Pull it toward you using the lower hand as if you’re trying to draw the kayak and the paddle closer together.
- Stop before you hit the hull’s side and slice the blade out of the water sideways.

You’ll likely have to perform more than one draw stroke; recover your blade and repeat the steps as needed.
Sculling Stroke
The sculling stroke will be a relatively hard kayak stroke technique to master. But once you get a hold of it, it also becomes one of the most powerful – and elegant – ways to move your kayak sideways.
Here’s how to perform a sculling draw:
- Wind your torso to the side, holding the paddle upright – nearly vertical – with the blade in the water. Keep your upper arm high and bent at a 90-degree angle.
- Turn the blade’s power face toward the kayak and feel how it behaves in the water.
- Open up the power face in the sweep’s direction and start moving the paddle back and forth along a short path. Keep the movement continuous and parallel to the hull and the blade fully submerged.

With a proper angle and adequate force, your kayak should start moving sideways – rather than forward or backward.
Carving Turns & Edging Your Kayak
Carving turns can be performed on their own or as a boost for other turning methods. It’s a highly versatile paddling maneuver – and can be particularly useful when you’re counteracting the effects of strong winds.
You can’t do a carving turn without edging your kayak, though – and yes, it’s what it sounds like:
You’ll tilt the kayak to one side and roll it on its edge.
It might feel like you’re going to capsize at any moment, but you’re in control; it’s not the same as leaning a bit too far.

Here’s how to edge your kayak:
- Keep your eyes on the horizon; this improves balance and helps maintain a strong posture.
- Push one knee up against the hull while simultaneously shifting the weight to the opposite hip. The curve of the hull will submerge on one side while lifting the other.
- Stay as upright and as close to the center as possible; only the ‘yak should be leaning.
- Hold the edge for a bit and then roll it down by slowly raising the opposite knee.
Carving essentially means holding the edge and throwing a basic forward stroke into the mix. It’s going to take practice – lots of practice – so don’t expect to nail it on your first try.
You may also be interested in
How To Paddle A Kayak: A Few More Tips For Beginners
Keep the following in mind as you’re working on your kayaking paddling techniques and learning how to paddle a kayak:
- Choose The Right Paddle Size – Stand up straight and extend your arm above your head; that’s your target paddle length. Paddlers up to five foot ten will likely need a 220 to 230-centimeter paddle; taller paddlers should go for 230 to 240 centimetres or longer.
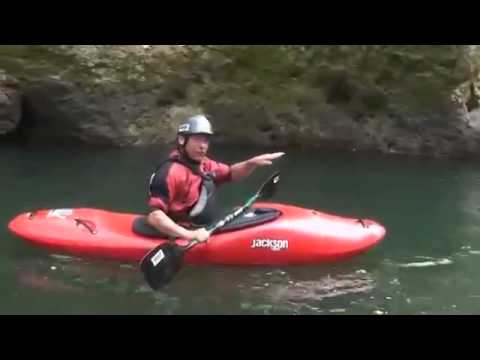
- When In Doubt, Take A Lesson – You’ll have a chance to practice basic strokes and rescue techniques, perfect your form, and go over safety rules under the guidance of a certified instructor. Also, asking questions in real-time – while you’re on the water – makes the learning process easier.
- Record Your Paddling Sessions – Whether you like what you see – or not – videos don’t lie. You’ll spot things that need fine-tuning, see what to focus on next, and be objective with yourself. Best of all, you get to see the improvements more clearly when they happen.
- Team Up & Practice With A Friend – I generally advise others against paddling solo; that’s kayaking safety 101. But teaming up with someone has other benefits, too. Your friend can keep an eye on you and point out things that need work – without making you uncomfortable. Plus, it’s fun.
Final Word On How to Paddle a Kayak

Exploring new waterways, getting in touch with nature, burning calories; the list of reasons why you might want to take up kayaking is a long one. It all starts with one thing, though – learning how to paddle a kayak.
Make no mistake about it:
The journey from learning the basics of holding a paddle to mastering different paddle strokes will be a long – and sweaty – one.
You came this far, though; you’re already well on your way to learning how to paddle a kayak and establishing a proper kayak paddling technique. Perfecting the skills you learned today will take time, but don’t let that discourage you. The result is more than worth it.
So, practice, practice, practice each of the kayak strokes – keep at it and let me know how it goes!