
One question I hear a lot from kayaking newbies is:
“Why do some kayaks come with a bulkhead? They’re already pretty buoyant.”
Consider this:
How will you keep your stuff dry and safe and ensure that your sit-inside ‘yak doesn’t completely fill up with water?
If you capsize your kayak and it doesn’t have a bulkhead, you can pretty much say goodbye to your cargo. Worse yet, your kayak will start taking in water and eventually sink.
Sounds like a horror story?
Then get ready to learn the what, why, and how of kayak bulkheads.
Kayak Bulkheads Key Takeaways
- What is a kayak bulkhead? A crucial component of most sea kayaks, a kayak bulkhead is a vertical wall that forms a water and air-tight compartment inside the kayak’s hull. They are typically located at the front and rear of the kayak, and are made of waterproof material such as plastic or composite. Its primary function is to boost buoyancy, by preventing water from flooding the entire cockpit in the event of a capsize, thus helping keep the kayak afloat – but they are often used, in conjunction with small hatches, to provide additional storage space.
- Bulkhead downsides: While they provide important benefits such as improved buoyancy and stability, kayak bulkheads also have their drawbacks. If punctured or breached in any way, it can be difficult to drain the water out of them, often requiring holes to be drilled into the kayak’s hull to release the trapped liquid. What’s more, without any external point of access a bulkhead will decrease a kayak’s overall usable space. Not only does this reduce onboard storage capacity but also limits paddler leg room – which is why they’re not favored on smaller boats such as whitewater kayaks.
- Alternatives to kayak bulkheads: A cheap and flexible alternative would be float bags – removable air-filled bags that can be inserted into the hull of a kayak for additional buoyancy – they can be taken out when not needed, feeling up space.
- DIY bulkheads: A cost-effective alternative to purchasing a premade bulkhead is to construct one yourself using Minicell foam. This can be done by cutting a piece of foam to the desired shape and size, then attaching it to the kayak’s hull by applying a bead of flexible sealant along the edges. This DIY kayak bulkhead not only provides added buoyancy, but also allows for a custom fit to suit the specific needs of you and your kayak.
- Troubleshooting: If you suspect your kayak bulkhead is leaking, the initial step is to visually inspect it for any signs of damage like cracks or punctures. Next, undertake a pressure test; fill the kayak with compressed air and spray around the bulkhead with soapy water to check for leaks. If any damage or leaks are identified, you will need to either repair, reseal or replace the bulkhead.
What Is A Kayak Bulkhead And Why They’re Important
If you’ve ever watched an episode of Star Trek, there is a pretty good chance that you’ve heard the term “bulkhead” before.
Most people think that bulkheads are basically doors you can seal so that nothing gets through – and in a sense, that’s exactly what bulkheads are.
But they’re even more simple than you think:
A bulkhead is a sealed barrier – an integral part of the kayak’s anatomy that helps create two or more compartments that are both air- and water-tight.
Pretty simple, right?
A kayak bulkhead is simply just a vertical wall that runs from the hull to the deck, creating a safe bubble for air – and your cargo. You will usually find bulkheads in sea and touring kayaks, where air-tight storage is vital.
Even more so, bulkheads also play a huge role in preventing the entire kayak from filling up with water, keeping your boat afloat, in case of a capsize:
Since the compartment is filled with air, the bulkhead will prevent your kayak from sinking if you flip over by providing additional buoyancy.
Bulkheads are usually fitted onto the kayak during the manufacturing process – but you can also find them as an aftermarket accessory.
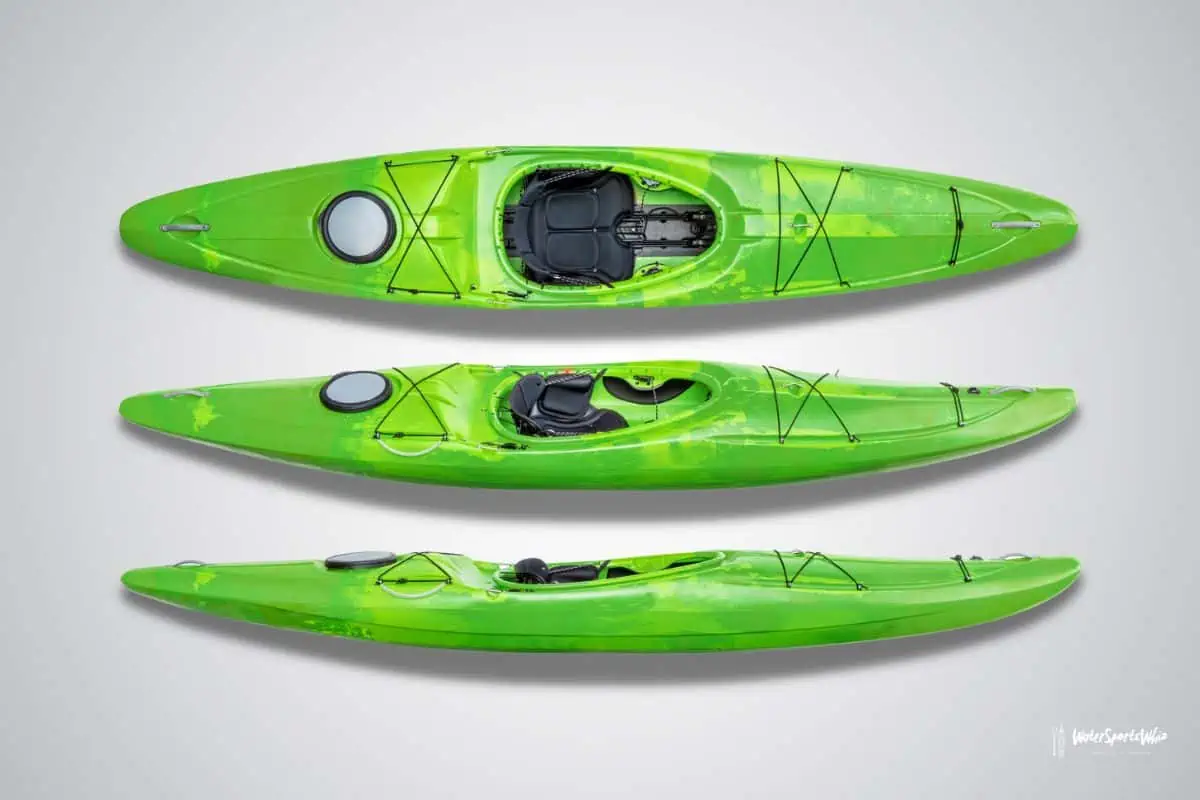
Some kayaks have adjustable bulkheads that can be removed, though – the best example being whitewater kayaks. In this case, they don’t just add buoyancy – they absorb shocks from running rapids, as well.
The Jackson Kayak Uni-Shock Bulkhead is a prime example of that:

While we’re at it, I should mention that kayak bulkheads can be made from a variety of materials – including foam, plastic, and composite materials such as glass or carbon fiber. Installation-wise, they’re either plastic welded (as in, permanently fitted) or attached using a flexible, marine-grade glue or sealant.
Are There Any Downsides To Kayak Bulkheads?

Unfortunately, it is not all rainbows and sunshine with kayak bulkheads. They can be a source of frustration for paddlers, as well.
For starters, they’re notoriously difficult to drain.
Why?
Let me paint you a picture:
You have a kayak with a permanently sealed bulkhead. Great. But what’s that?! It got punctured somehow – and now it’s letting in water. How will you drain that water out of the kayak’s hull?
If there’s no storage hatch, you can’t really use a bilge pump. Your only option is to drill a bigger hole to let the water out and then seal it.
That’s not where the downsides end, by the way:
If you use your kayak’s bulkhead as a storage compartment, it could lead to an uneven weight distribution. And as you can imagine, that may negatively affect the performance and handling of your boat.
Besides, when an improperly sealed bulkhead starts letting in water, even the smallest amount can mess with the kayak’s stability.
Are There Any Alternatives To Kayak Bulkheads?

If bulkheads are hard to drain and can throw off your kayak’s balance, is there an alternative? Of course, there is!
And you would (probably) never guess what it is:
It’s bags! Yes, bags. Well, float bags, to be more precise.

Just like their name suggests, kayak float bags are inflatable bags that can be inserted into the bow and stern areas of your kayak – where the bulkheads usually are – to boost buoyancy. That
way, even if you capsize, it won’t fill up straight away, and you’ll be able to recover quickly.
They can be easily removed, which gives them a definite advantage over bulkheads – especially if you’re not interested in permanent kayak modifications but still need the added buoyancy.
A Step-By-Step DIY Guide To Proper Kayak Bulkhead Installation

So, after some careful consideration, you’ve decided to equip your ‘yak with its own bulkhead. Sounds like a plan!
Did you know you can DIY a bulkhead, by the way?
Well the good news is yes, it is possible to DIY a bulkhead for a kayak. They can be made using materials such minicell foam, plywood or polyethylene sheets, which are readily available at most hardware or boating supply stores. Although I would highly recommend foam bulkheads as a cost-effective option for creating sealed compartments in a kayak.
However, it’s important to make sure that the bulkhead is properly installed and sealed to ensure it is watertight and safe to use.
 Editor’s Note
It’s important to note that modifying a kayak, including the addition of a bulkhead, may void the manufacturer’s warranty. Be sure to check the warranty terms and conditions before making any modifications. If you’re unsure whether a specific modification will void the warranty, it’s best to contact the manufacturer for clarification. This will help to avoid any issues that may arise in the future if the kayak needs to be serviced or repaired.
– Sam O’Brien
Here’s what you’ll need:
- 3-inch thick Minicell foam
- Course grit sandpaper
- Dishwashing liquid or multi-surface cleaner
- Vacuum
- A pair of protective gloves
- Lint-free cloths
- Acetone
- Tube of flexible sealant and caulking gun
- Craft knife or saw
Step #1 Prepare Your Work Area
The most important stage in any DIY project is to correctly setup and prepare your work area.
So before you start, find a location that is dry, brightly lit with ample space to work on your kayak. Then, set up a tarp on the floor to place the kayak on it, or position your kayak on a set of stands to keep it stable and secure while you work on it.
Next, gather your supplies and tools – and make sure to keep them within reach.
Step #2 Strip The Kayak
Okay, it’s time to do some stripping:
Before you access the interior of your ‘yak, remove any gear or accessories that might be in the way – including the kayak seat, thigh braces, and footrests.
Step #3 Wash & Dry The Kayak
The inside of the kayak must be clean and free of any debris, grease or dust; otherwise, the sealant likely won’t bond properly.
That’s why I recommend thoroughly vacuuming the cockpit and the “end” of your ‘yak – the area where the bulkhead will be.
Then, move on to cleaning the hull and the bottom of the deck. Use a soft cloth soaked in soapy water (a couple of drops of detergent will do).
Once you give your hull a good ol’ rub, allow it to dry completely. You can speed up this process by using a lint-free cloth – but either way, make sure it’s dry before proceeding.
Step #4 Cut The Foam To Create The Bulkhead
Cut out a piece of Minicell foam using a craft knife so that it fits the interior of your ‘yak. It should be at least 3 inches thick and slightly larger than the hull.
Then, gradually remove the foam until it perfectly fits the shape of your kayak. I recommend you check the fit after each cut so that you don’t overdo it by accident.
You can also use a piece of cardboard to make a template before cutting the foam. It’ll save you a lot of time
When handling cutting tools, be sure to use protective gloves to avoid injuries!
Step #5 Sand The Edges
Take a piece of coarse grit sandpaper and lightly sand the areas of the deck and hull where your bulkhead will be. This ‘etching’ step is crucial for ensuring that the sealant will stick and bond properly.
You might need to use the vacuum cleaner again to get rid of any dust. Then, wipe the bulkhead area with acetone. It will get rid of any oils or grease that would otherwise mess with the sealant and prevent it from adhering properly.
Make sure the acetone is dry before attaching the DIY bulkhead; it could damage the foam.
Step #6 Apply The Sealant
And now, for the most finicky part:
Use a tube of flexible sealant to seal the foam bulkhead into place. Make sure it’s applied evenly and in a continuous line that overlaps onto both the kayak’s hull and deck – as well as any edges where they meet.
Don’t worry if it gets messy; that’s to be expected. You can wipe away any excess sealant with a lint-free cloth.
Leave your ‘yak somewhere safe and dry for at least 48 hours – enough curing time for the sealant to fully set.
Step #7 Test The Seal
You can use a large bucket of water (or a garden hose) to check if the seal is water-tight. Fill up your kayak’s cockpit and gently tug on the bulkhead. There shouldn’t be any gaps where water can come in. If you do see a leak, though, you can simply remove the bulkhead and apply more sealant.
And that’s how you install a perfectly functional DIY kayak bulkhead.
What Should I Do If My Bulkhead Springs A Leak: Troubleshooting Tips

There’s nothing more frustrating than a leaky kayak – especially when that leak occurs in what was supposed to be an air-tight compartment.
So, I figured I should walk you through a step-by-step guide on how to spot and fix bulkhead leaks.
Before you start the troubleshooting process, though, you should gather the necessary supplies:
- A spray bottle (with a mix of water and dish soap)
- A hand pump
- Acetone and a rag
- A bottle of marine-grade sealant
Step #1 Visual Inspection
Sure, you could go straight to spraying stuff with soapy water, but I would suggest that you do a thorough visual inspection first.
Examine the bulkhead for any damage to its surface, seams, or welds. If there are any scruffs or bumps, they’ll be easy to spot. And while you’re at it, look over the hatch covers for any signs of damage – and pay special attention to the rubber seal or gasket. If the hatches are worn out and damaged, now would be the time to replace them.
If the kayak passes the visual inspection, you can bring out the big guns – or, in this case, an air pump.
Step #2 The Pressure Test
Now, this is where that bottle of dish soap and water (and an air pump) comes in:
First, remove the deck fittings above the sealed compartment of your kayak and insert the pump nozzle. Before you start pumping, though, make sure the hatches are all closed and sealed.
Then, spray the soap mix around the storage hatch and bulkheads – and any other areas where you suspect the leak might be – and start pumping. Don’t overdo it, though:
Slowly pump the air into the compartment until you can spot bubbles indicating where the pesky leak is.
Step #3 Repairing The Leak
If the leak is small, you might be able to spot-fix it. That would be the ideal scenario. However, if you’re dealing with a large leak, you’re in for a lot of work.
And by “a lot of work,” I mean:
You’ll have to remove the bulkhead and reinstall it.
You can remove the bulkhead by simply cutting the sealant and then gently pulling it away from the hull. Be sure not to force it; you’ll only end up damaging the bulkhead further.
Once you’ve removed it, gently scrape away any sealant that’s left on both the bulkhead and the inside of the kayak. Next, vacuum the kayak’s interior to remove dust and debris, and clean the bulkhead area with acetone to ensure its grease free.
Leave the acetone to dry before proceeding to the next step – resealing and then reinstalling the bulkhead:
Apply medium-sized beads of sealant on areas where you removed the old layer of sealant. Put the bulkhead back into the ‘yak and ensure it fits tightly into place. Now, apply the sealant to the edges and seams just to solidify the bulkhead and create an air-tight seal.
Let the applied sealant dry and cure for at least 48 hours.
Step #4 The Re-Test
While this step isn’t mandatory, I recommend that you take a moment to retest the bulkhead for any leaks by repeating Step #2 of this guide.
If there are no leaks, you’re pretty much done – and ready to hit the waters. What if there’s still a leak, though?
I have some bad news:
You’ll have to refit and reinstall the bulkhead again.
However, if you’ve followed all of these steps closely, your bulkheads should be fully waterproof and provide long-lasting protection for years to come.
If you don’t feel like going through the entire process again, there is also the option of consulting a kayak repair technician. Professional assistance is sometimes the preferred choice.
Why Understanding Kayak Bulkheads Is Key For Safe Paddling
Sealed bulkheads are crucial components of most (if not all) sit-in kayaks. Besides serving as a storage area, they also play a vital role in providing additional buoyancy because they form an air-tight space inside the kayak.
Do not underestimate the importance of kayak bulkheads. It’s not just a matter of keeping your stuff dry. A bulkhead which isn’t properly sealed and that lets in water will mess with the kayak’s stability and performance – and may even cause it to sink in the event of a capsize.