
You buy a kayak, get yourself a matching paddle, and think, “Oh, I can’t wait to get this bad boy out for a spin!”
If only things were that simple.
Unless you made the deliberate decision to get the lightest, most compact kayak out there – or, better yet, got yourself an inflatable – you still have to figure out how to carry it to and from the water.
A simple trolley can be the solution to all your kayak transportation problems. Well, not all your problems; you can’t really haul your ‘yak down the highway on a cart. But from the parking lot to the put-in spot? These carts are hard to beat on that terrain.
So, if you’re tired of wasting all your energy on hauling gear instead of paddling, stick around. We’ll discuss why you definitely need to add one of these to your list of must-have kayaking accessories – and, more importantly, how to use a kayak cart properly.
How To Use A Kayak Dolly: Quick Summary
A metal frame, two wheels, and a platform or poles for the kayak to rest on – it may seem simple, but a kayak cart can make a world of difference. Whether you’re hauling your kayak to the boat ramp, portaging around obstacles or hazards, or reaching remote put-in spots, a kayak cart is an essential piece of kayaking equipment .
Platform-Style Cart Usage:
- Lay the kayak on a flat surface, placing the cart near its weight center, typically behind the seat.
- Lift one end of the kayak, sliding it onto the cart’s platform, ensuring even weight distribution.
- Adjust the kayak’s position so the keel line aligns with the platform’s center.
- Secure the kayak with straps, checking its positioning and stability before tightening completely.
- To transport, lift the kayak’s free end and move. Unstrap and unload at your destination.
Plug-Style Cart Usage:
- Adjust the cart’s arms to match the kayak’s width.
- Turn the kayak on to its side, align and insert cart arms into the scupper holes.
- Return the kayak to an upright position, securing the cart in place.
- For extra security, consider adding a strap or bungee cord.
- To transport the kayak, lift it from the carry handle and carefully push or pull it to the water’s edge. When you arrive, follow these steps in reverse to remove the cart.
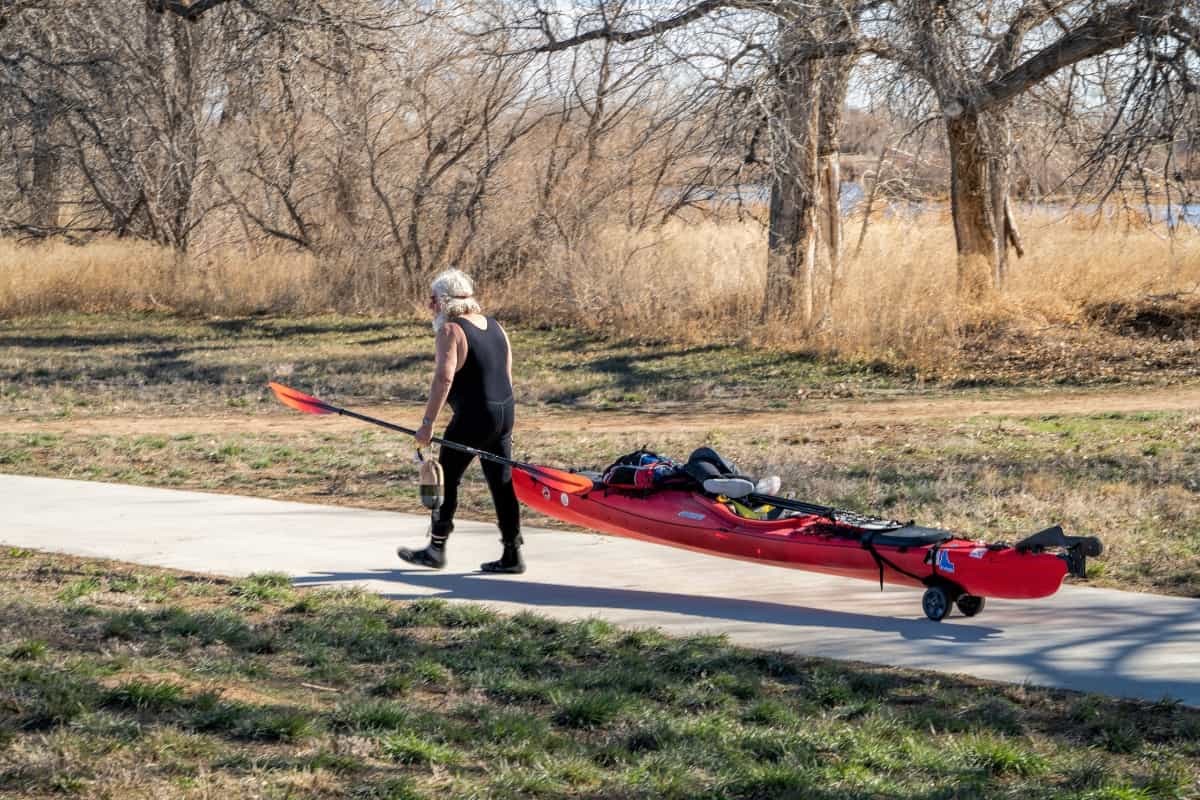
Taildragger Cart Usage:
- Position the kayak with the stern facing you, using a mat to protect the bow.
- Lift the stern, sliding the cart underneath.
- Strap and secure the kayak to the cart, checking balance to avoid tipping.
- Transport by holding the front handle. At the destination, unstrap and remove the cart from under the stern.
How To Use A Kayak Cart: A Step-By-Step Guide
You know what it is – and you (hopefully) understand why you need it. So, that means it’s finally time to talk about actually using one.
The first step – the process of assembling the cart – can look slightly different depending on the specific type and model you have. That’s what the user manual is for; you should always follow the manufacturer’s instructions.
With that out of the way, here’s a step-by-step guide on how to use a kayak trolley.
How To Use A Platform-Style Kayak Cart
Obviously, you should start by assembling your kayak cart according to the provided instruction manual – but I can’t be of much help in that regard.
Once that’s taken care of, though, and you’re ready to hit the waters – that’s where my guide on how to use a standard platform-style kayak cart comes in:
- Find a flat and even surface where you can lay your kayak down right-side up, with the cart next to it, as close to the center of the kayak’s weight as possible – which is typically right behind the seat.
- Grab hold of the kayak’s carry handles and lift one end (bow or stern), sliding it onto the cart’s padded platform. Aim to position the cart around the center of the hull. This way, there will be an even weight distribution, and you will carry less of the kayak’s full weight.
- Now, move to the opposite end and carefully adjust the position of the kayak, ensuring that the keel line is perfectly aligned with the center of the platform.
- Secure the kayak in place using the provided straps; make sure the buckle is at the top side, where you can easily access it for adjustments and unloading. If possible, run the strap through an on-deck tie-down point to prevent it from slipping out of place.
- Don’t tighten them all the way yet, though; I recommend checking the kayak’s positioning and weight distribution first. The cart shouldn’t feel wobbly or unstable.
- You can re-adjust the kayak’s position on the platform if needed. Then, you can tighten the straps all the way.
- Lift the “free” end of your kayak using the bow or stern carry handle (depending on the cart’s placement) and pull it to your desired destination. If you’d like to keep an eye on your kayak during transport, try pushing the cart in front of you.
- Once you reach your put-in spot, remove the straps, lift one end of the kayak, and slide the cart out from underneath to unload it.
That wasn’t too hard, was it?
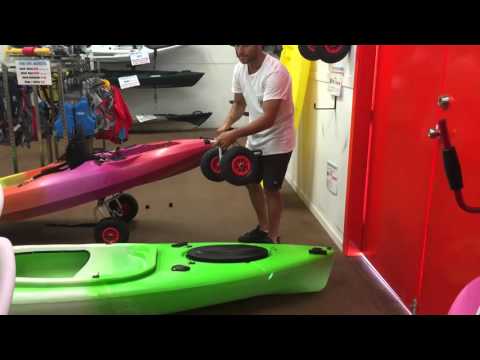
How To Use A Plug-Style Kayak Cart
If you own a SOT ‘yak, here’s how to use a plug-style (scupper) kayak cart to transport it to and from the water:
- Start by adjusting the cart’s arms according to the kayak’s width to ensure the right fit.
- Lay your kayak on the ground; remove the scupper plugs and secure any loose gear inside the cockpit. Then, flip the kayak onto its side; you’ll need access to the bottom of the hull for this to work.
- Holding the kayak with one hand, align the cart’s two arms with the scupper holes; lift the cart up slightly and slide the “arms” in through the bottom of the hull.
- With the poles in place, you can slowly flip the kayak back to an upright position. I’d recommend holding the cart in position as you turn the kayak over to ensure that the arms don’t slide out in the process.
- Once your kayak is back in an upright position, the weight of the hull will push down and secure everything in place. If you don’t want to leave anything up to chance, though, feel free to tie it up with a bungee cord or a strap for additional security.
- Grasp the kayak’s carrying handle and pull – or push, if that’s more convenient for you – it from one location to another. Use caution and try to move slowly; obstacles and uneven terrain could easily cause the cart to flip over.
- Once you reach your put-in spot, roll the kayak over to its side, slide the cart’s poles out of the scupper holes – and that’s it, you’re ready to hit the water.
How To Use A Taildragger Kayak Cart
Okay, you know the drill by now. With the initial assembly out of the way, here’s how to use a taildragger kayak cart:
- Lay your kayak down on a flat and even surface, with the rear end – the stern – facing you. I recommend placing a towel or some sort of mat under the bow; otherwise, it might get scratched in the process of lifting the ‘yak onto the cart.
- Grab hold of the carry handles (or any other secure point on the hull) and lift the stern off the ground – enough to make room for the cart to slide in underneath it.
- Lower the kayak onto the padded support, ensuring the cart is aligned with the stern.
- With the kayak resting on the cart, you can secure it in place by fastening the straps and tightening them around the stern.
- Be sure to check if the kayak’s weight is evenly distributed on the cart; you don’t want it to tip backward the second you let go of the bow.
- Haul the ‘yak to your desired launch spot by holding onto the front carry handle; the cart will support the stern and prevent it from dragging on the ground.
- Once you reach your destination, simply loosen the straps and lift the kayak’s stern to slide the taildragger cart out from under it.
Troubleshooting Common Kayak Cart Issues

It’s just two wheels and a metal frame. You’d imagine there’s not much that can go wrong, right?
Oh, if only things were that simple.
There are quite a few issues you may run into. So, here are some tips on dealing with common kayak cart problems – and, most importantly, avoiding them in the future.
Issue #1: Wobbly Or Unstable Cart
An unstable cart that keeps wobbling and tipping over to one side won’t be of much use. I mean, what’s the point of having one if you’ll have to wrestle with the cart – and the kayak – every step of the way?
Plus, the constant battle for balance opens the door for mishaps – and, potentially, injuries.
The most common culprit is usually improper weight distribution. So, before you start blaming the cart’s design and structural integrity, I would suggest adjusting the kayak’s placement.
If that doesn’t help, you can move on to the frame. Ensure it’s not damaged, and check for any loose or missing parts, like nuts, bolts, and fasteners.
Issue #2: Difficulty Maneuvering The Cart
The first thing you’ll want to look into if you’re having a hard time maneuvering your trolley are the wheels – or, more specifically, wheel alignment and tire pressure.
If everything seems to be in order wheels-wise, check the weight distribution. Sometimes, the solution can be as simple as adjusting your kayak’s position. The weight of the load should be balanced and evenly distributed; it’s a matter of simple physics, really.
Issue #3: Damaged Or Punctured Wheels
Punctured tires – and otherwise damaged wheels – are going to affect the handling of your kayak trolley; that much should go without saying.
I mean, would you still drive your car if one of the tires had a gash in it? Yeah, I figured that’s a hard pass.
Obviously, this won’t be an issue with solid, puncture-free wheels. But, as I said earlier, the type of terrain you’ll use the cart on is a big factor here, and these won’t necessarily work for you.
So, if you’re stuck with air-filled tires, my advice is to keep a repair kit and a small hand pump at the ready.
Solutions & Preventative Measures
I’m a firm believer that prevention is always better than cure – and that applies to your paddling gear and accessories, too.
On that note, I have a few tips:
- Inspect the cart regularly – You should take the time to give your cart a quick once-over every once in a while and look for signs of wear and tear. Replace any worn or otherwise damaged parts, tighten bolts and screws, and check the tires before each outing.
- Avoid overloading the cart – It should go without saying, but stick to the manufacturer’s specified weight capacity. Kayak carts have a weight limit for a reason – and going over it could lead to structural damage.
- Store the cart properly – Follow the same practices you would for kayak storage; keep your trolley in a cool, dry place and away from direct sunlight.
- Use the cart as intended – I’ve seen people using them as makeshift seats or to haul cool boxes and other gear. Sure, it’s convenient – but it can also put uneven strain on the cart’s frame, causing damage in the long run.
What Is A Kayak Cart?
Types Of Kayak Carts
Plug-Style (Scupper) Carts
Platform-Style (Standard) Carts
 Editor’s Note
Within the world of platform-style carts, there is a variation known as Cradle Trolleys. While they technically belong to the platform cart category and are used in the same way, they have a distinctive physical difference.
Unlike the standard platform cart, the cradle support trolley features two horizontal arms that cradle the kayak’s hull, instead of providing a flat platform for it to rest on. This style of cart is specifically designed to cater to the needs of fishing kayaks, allowing them to easily accommodate heavier loads.
– Sam O’Brien
Taildragger (Strap-On) Carts
The Right Wheel Type For The Terrain
- Pneumatic wheels, similar in style to bicycle tires which are filled with air, tend to be more shock absorbent and weigh less than their airless, solid counterparts. These perform well on a variety of surfaces – including grass and sabd – and can be more “forgiving” on uneven terrain. Be prepared for possible punctures, though.
In short, your choice comes down to the specific environment you’ll be using the cart in; the wheels directly affect the cart’s performance on different types of terrain.
Popular Kayak Trolley Brands & Models
As you can imagine, there are a TON of different kayak cart models out there – and, at this point, it should be clear that they’re not all made the same. Some are simply better than others – more durable, easier to set up, and more adaptable to a range of terrains.
Then again, you could say the same for any other piece of paddling gear – including that ‘yak of yours. So, what’s my point, exactly?
You might notice that certain kayak cart brands consistently appear – and rank high up, might I add – on those “best-of” types of lists. Why? They generally perform better than the competition, especially when it comes to the key features that make up a reliable kayak cart:
- Overall durability
- Ease of use and assembly
- Maximum weight capacity
- Wheels and terrain adaptability
- Compactness and foldability for storage
Now, I could go into the details – but I’d risk turning this into a full-blown kayak carts buying guide.
So, instead, I figured I’d just share a few of my go-to kayak cart brands and models – Suspenz, Malone, Seattle Sports, and Railblaza’s C-Tug are my personal favorites, for example – and you can go from there.
Frequently Asked Questions About Kayak Carts
Where do you put a kayak cart when kayaking?
You can store your cart on the kayak’s deck while you’re in the water. If you don’t have room for a cart onboard, I suggest tying it to a fixed structure near the launch spot – which only works if you’ll be making a round-trip – or walking back to your car and leaving it there. Keep in mind that you’d have to leave your kayak unattended for a while in that case, though.
How do you secure a kayak cart?
If you have no choice but to leave your kayak cart unattended, the best way to secure it is to tie it to any permanent structure near your launch spot – a tree or a fence, for example. Don’t just tie the cart up with a piece of cord and hope for the best; invest in a reliable bike cable lock or lockable tie-down straps.
Is a kayak cart worth it?
Yes, a kayak cart is worth it – especially if you tend to choose remote paddling spots that often involve portaging or you’re into kayak fishing, so have lots of heavy gear. For one, it’s more convenient since you’ll be able to carry most (if not all) of your fishing gear in one go. Two, it will protect your kayak from the damage of dragging it across rough terrain. And three, it’s easier on your back, and you’ll save some of that energy for the actual paddling.